Settings for Geotrek-admin mobile
Info
For a complete list of available parameters, refer to the default values in geotrek/settings/base.py.
Reference data synchronization interval
Defines the maximum amount of time reference data can remain unsynchronized. Once this interval has elapsed, the user must manually synchronize the reference data before continuing to use the application.
Example:
GTAM_CONFIG["REFERENCES_INTERVAL_SYNC"] = 7 * 24
Note
The value is expressed in hours.
Embedded data synchronization interval
Defines the maximum amount of time embedded data can remain unsynchronized. Once this interval has elapsed, the user must manually synchronize the embedded data before continuing to use the application.
Example:
GTAM_CONFIG["DATA_INTERVAL_SYNC"] = 7 * 24
Note
The value is expressed in hours.
Minimum zoom level for map synchronization
Defines the minimum zoom level from which users are allowed to download map tiles.
Example:
GTAM_CONFIG["SYNC_MAP_MIN_ZOOM"] = 10
Note
A zoom level greater than
10is recommended to limit the number of downloaded tiles.
JWT authentication
Defines the lifetime of the JSON Web Tokens used for API authentication.
Example:
SIMPLE_JWT["ACCESS_TOKEN_LIFETIME"] = timedelta(days=3)
SIMPLE_JWT["REFRESH_TOKEN_LIFETIME"] = timedelta(days=21)
Note
ACCESS_TOKEN_LIFETIMEdefines how long an access token remains valid before it expires.REFRESH_TOKEN_LIFETIMEdefines how long a refresh token remains valid. Once it expires, the user must authenticate again to obtain new tokens.
Nginx configuration for docker
This new version require the following configuration in your Nginx server to allow the mobile application to access the API:
Example:
location ~ ^/m/(?<remaining_path>.*)$ {
    root /;
    try_files /opt/geotrek-admin/var/frontend/dist/$remaining_path /opt/geotrek-admin/var/frontend/dist/index.html =404;
}

location ^~ /m/sw.js {
    alias /opt/geotrek-admin/var/frontend/dist/sw.js;
    add_header Cache-Control "no-store, no-cache, must-revalidate, proxy-revalidate, max-age=0";
    expires off;
    access_log off;
}

location = /m {
    return 307 /m/;
}
This snippet is defined in new default Nginx configuration for Docker. https://github.com/GeotrekCE/Geotrek-admin/blob/master/docker/install/conf/nginx.conf
Configuring map base layers
Geotrek-admin supports both raster and vector tile basemaps.
Basemaps can be added in two different ways:
Automatically, using the
install_layermanagement command. This is the recommended approach for the providers supported by the command (IGN, OpenStreetMap, Mapbox, etc.).Manually, from the administration interface. This method is intended for custom basemaps that are not provided by the
install_layercommand.
Installing predefined basemaps
The install_layer command allows you to install predefined basemaps from
supported providers.
The generic syntax is:
sudo geotrek install_layer <provider> [layer]
docker compose run --rm web ./manage.py install_layer <provider> [layer]
The list of supported providers and their configuration options is available in the django-mapbox-baselayer documentation.
Some providers, such as ign, include several predefined basemaps. You can
list the available basemaps by specifying only the provider:
sudo geotrek install_layer ign
Output:
- plan: Plan IGN (raster)
- ortho: Orthophoto IGN (raster)
- maps: Cartes IGN (raster)
- scan_25: Scan IGN (raster)
- cadastre: Cadastre IGN (raster)
- plan_vt: Plan IGN VT (mapbox style)
- scan_25_vt: Scan IGN VT (mapbox style)
- gris_vt: Gris IGN VT (mapbox style)
- cadastre_vt: Cadastre IGN VT (mapbox style)
To install the IGN orthophoto:
sudo geotrek install_layer ign ortho
docker compose run --rm web ./manage.py install_layer ign
Output:
- plan: Plan IGN (raster)
- ortho: Orthophoto IGN (raster)
- maps: Cartes IGN (raster)
- scan_25: Scan IGN (raster)
- cadastre: Cadastre IGN (raster)
- plan_vt: Plan IGN VT (mapbox style)
- scan_25_vt: Scan IGN VT (mapbox style)
- gris_vt: Gris IGN VT (mapbox style)
- cadastre_vt: Cadastre IGN VT (mapbox style)
To install the IGN orthophoto:
docker compose run --rm web ./manage.py install_layer ign ortho
Managing basemaps
Once installed, basemaps are managed from the administration interface:
<your_geotrek_admin_url>/admin/mapbox_baselayer/mapbaselayer/
From this page, administrators can enable, disable or edit existing basemaps without modifying the application configuration.
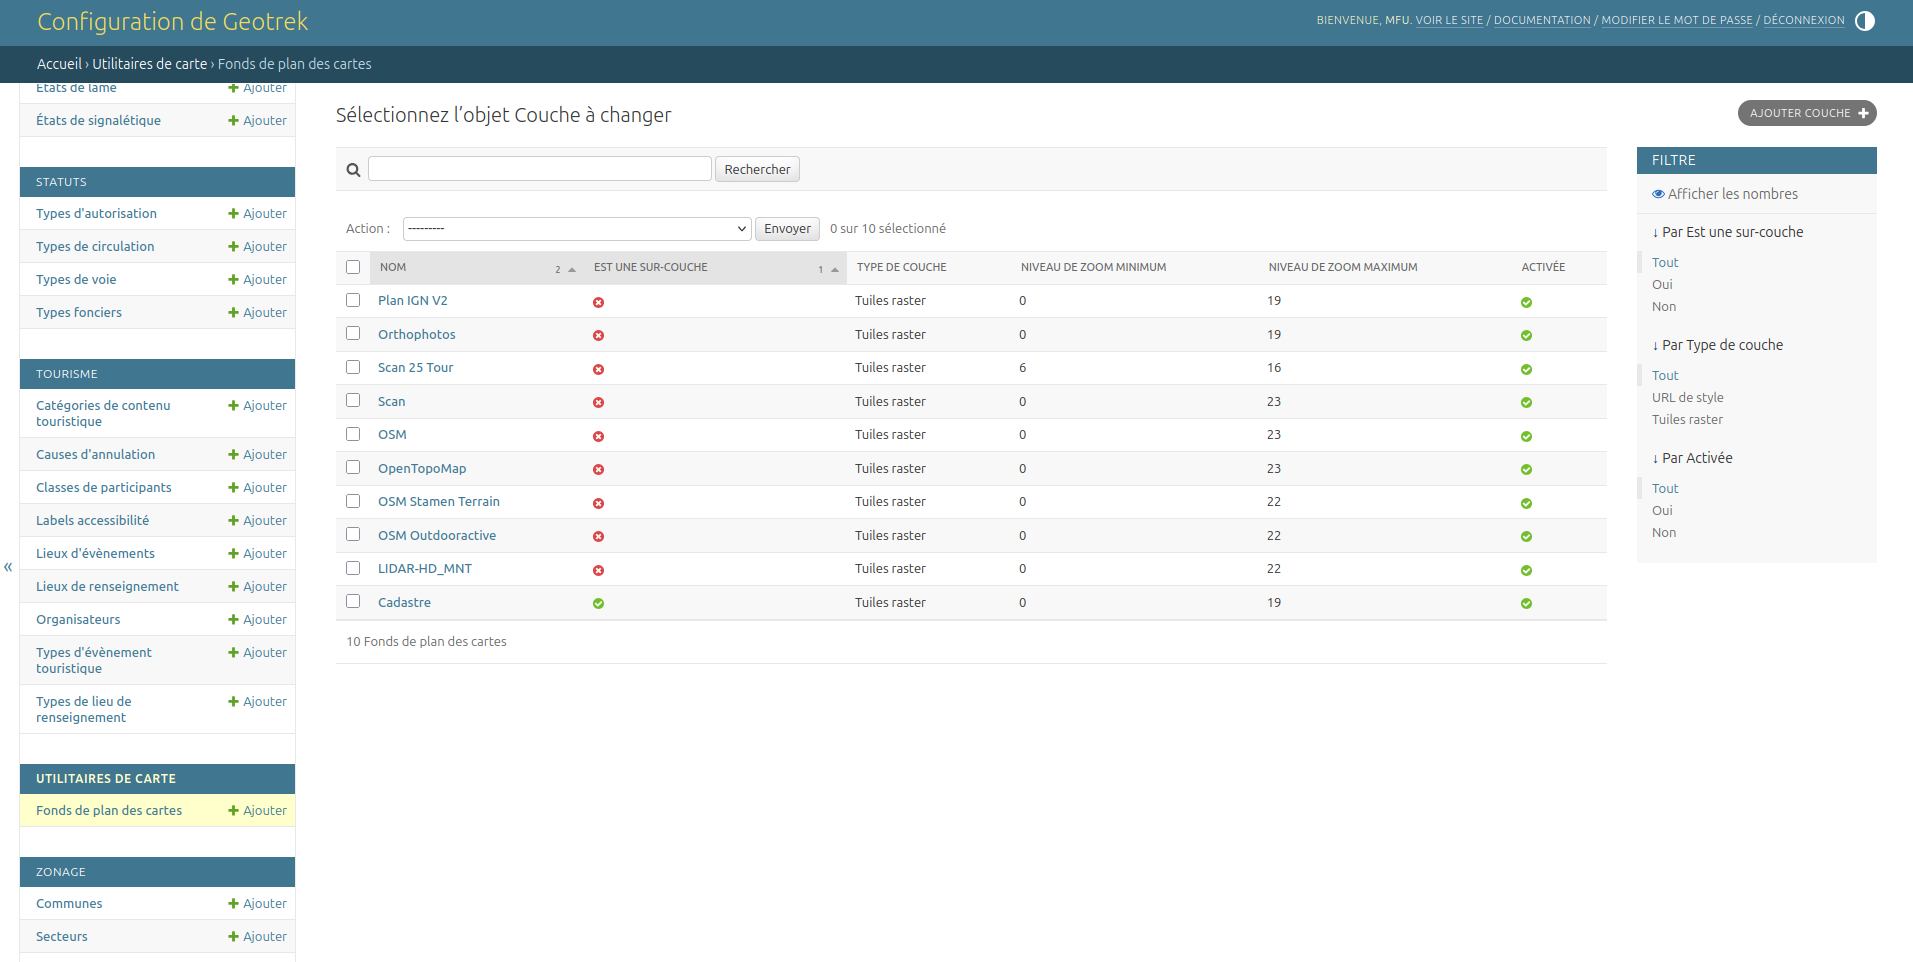
Managing basemaps
Important
If LEAFLET_CONFIG['TILES'] is defined in custom.py, it overrides the
basemaps configured in the administration interface.
To use the administration interface, comment out or remove the
LEAFLET_CONFIG['TILES'] setting before restarting Geotrek-admin.
Custom basemaps
If the basemap you need is not available through the install_layer command,
you can create it manually from the administration interface:
<your_geotrek_admin_url>/admin/mapbox_baselayer/mapbaselayer/add/
Both raster and vector tile basemaps are supported. However, vector tile basemaps are not yet available in the layer control.
For vector tile basemaps, a valid Style URL must be provided.
Vector basemaps
Vector basemaps (like plan_vt or scan_25_vt) are currently used to generate PMTiles for Geotrek Admin Mobile (GTAM) offline maps.
They are not yet displayed in the Geotrek-admin layer selector. Support for displaying vector basemaps in the layer control is planned for Geotrek-admin v3.
Generating offline maps
The generate_pmtiles management command generates a PMTiles archive from a
vector basemap. This archive can then be used by Geotrek Admin Mobile (GTAM) to
display maps while working offline.
The command requires the identifier of the vector basemap configured in the administration interface.
Note
This command can only be used with vector basemaps (*_vt) configured in in the previous section.
sudo geotrek generate_pmtiles <id>
docker compose run --rm web ./manage.py generate_pmtiles <id>
Finding the basemap identifier
The <id> parameter corresponds to the identifier of the MapBaseLayer
configured in the administration interface.
Open the desired basemap from:
<your_geotrek_admin_url>/admin/mapbox_baselayer/mapbaselayer/
The identifier is visible in the edit page URL. For example:
<your_geotrek_admin_url>/admin/mapbox_baselayer/mapbaselayer/1/change/
In this example, the basemap identifier is 1.
You can then generate the corresponding PMTiles archive:
sudo geotrek generate_pmtiles 1
docker compose run --rm web ./manage.py generate_pmtiles 1
Generation time
Warning
PMTiles generation is resource-intensive and may take a long time, depending on the server hardware, the selected basemap and the maximum zoom level.
On a typical production server, generation can take around five hours, or even longer.
By default, PMTiles are generated for all zoom levels configured for the basemap layer in Geotrek-admin. For example, if the layer’s maximum zoom level is 18, tiles will be generated from zoom level 0 to 18. This range may vary depending on the layer configuration.
To reduce the generation time and the output file size, you can limit the
maximum zoom level using the --maxzoom option. For example:
sudo geotrek generate_pmtiles 1 --maxzoom 15
docker compose run --rm web ./manage.py generate_pmtiles 1 --maxzoom 15